Setup
Pre install considerations
Trial period
By default, on first install from the Appexchange you will be granted a 90 day trial. You will be able to process test payments during this period. After the trial period you will be required to sign up to a yearly subscription. Please contact us for a detailed quote / contract.
Upgrade an existing package
Asperato is a managed package, and can thus be upgraded the same way you would install any other package. Simply paste the link into the browser while logged into the Salesforce org, and follow the upgrade instructions.
Supported Salesforce versions, Lightning vs Classic
The Asperato package can be used in both Lightning and Classic mode, the functionality is identical. The only exception is that initial ‘Setup’ needs to be completed in Lightning. The tabs are the same, and the buttons that appear as lightning quick actions in lightning experience will appear as standard Salesforce buttons in Salesforce Classic.
Users may switch between either interface without affecting functionality.
Paths
If you're using Asperato in Lightning experience, we provide paths on our objects to give you a visual display of the payment or authorisation status. If you wish to use these paths, you'll need to follow the instructions here to enable paths.
Installing the package
Asperato ONE is installed from the Salesforce Appexchange. After installation, head to the "Asperato Setup" tab and follow the on-screen instructions to complete the installation.
Please note you must be in Lightning to complete this setup and have My Domain configured.
Connect Salesforce to Asperato
Asperato is a Connected App. To securely connect Salesforce to Asperato:
- Ensure you are in lightning experience, not classic
- Navigate to the Asperato ONE app
- Click on the "Asperato Setup tab"
- Click the "Setup configuration" button
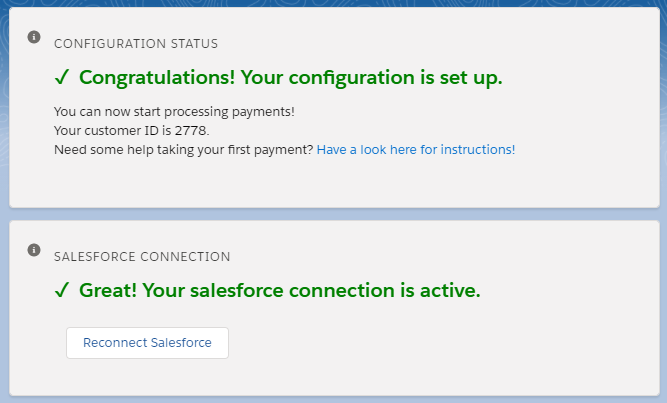
If you've completed the above successfully, you should see something like the following:
Connecting Salesforce to your chosen Payment Service Providers
On the Asperato Setup page you will see a list of pre-connected payment service providers. These allow you to take immediate test payments. If you wish to connect your own payment service provider, please see the instructions here.
Create your first payment request
We're assuming you're connected to Stripe as a test gateway, which is the default on installing the package. If you've connected to another gateway instead, please see their documentation for appropriate test card details.
Try out the connection and take a simple, one-off card payment:
- Navigate to the "Payments" tab
- Create a new Payment record:
- For "Amount", select 10
- For "Payment route", select card
- When the payment record has been created, click the "Process payment button".
- Fill in the form that appears using the following details:
- Card number:
4242424242424242 - Name:
Boris Smith - Expiry date:
10/22 - CVV:
123
- Card number:
Note that you should never use real card details in a test payment form. Doing so is insecure, and means you could be breaking PCI compliance regulations.
Refresh the Salesforce payment record once complete to see the payment record completed. Congratulations - you've taken your first test payment!
Add/ Remove Courtesy email Address from Asperato setup page (2.17+)
You can configure the email address on which you want to receive the courtesy and error notification email from Asperato app, installed in your SF org, from the “Asperato Setup” page -> Error Notification section.
Please refer to this link to know more about Courtesy notifications.
Adding email address
To add an email address,
- Navigate to the “Asperato Setup” page.
- Navigate to “Email Notification” section
- Click on the “New Email Address” button.
- A window will appear.
- In that window enter a valid email address on which you want to receive the notification emails related to “Asperato One” app installed in your SF org.
- Click on the “Add Email” button.
The email is now added. You can add up to five email addresses in this way.
Removing email address
To remove an email address,
- Navigate to the “Asperato Setup” page.
- Navigate to “Email Notification” section
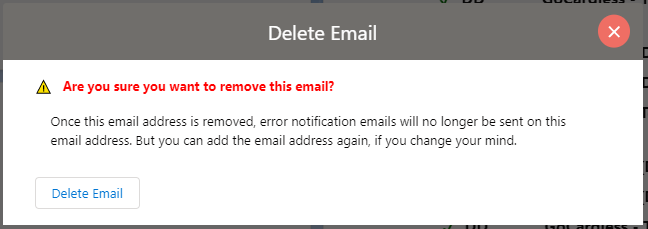
- Click on the “Delete” link.
- You will get a confirmation message. Click on the “Delete Email” button.
This will remove the email address to receive the error and courtesy notification emails from AsperatoOne app installed in your Salesforce Org.
User permissions
You probably won't want all your Salesforce users to have permission to take payments. Asperato ONE ships with 3 permission sets that you can apply to relevant users in your org:
- Asperato standard user - A user with this permission can setup payments, authorisations and payment schedules.
- Asperato refund user - In addition to the above, this permission allows a user to issue refunds.
- Asperato full admin - In addition to the above, this permission set provides access to all setup and administration features in the package.


